Wednesday, November 30, 2016

বেসিক সি প্রোগ্রামিং বাংলা

বেসিক সি প্রোগ্রামিং – শুরুর কথা

বর্তমান সময়ের জনপ্রিয় এবং বহুল ব্যবহৃত প্রোগ্রামিং ল্যাঙ্গুয়েজের মধ্যে সি অন্যতম। আধুনিক প্রোগ্রামিং ল্যাঙ্গুয়েজের যাত্রা শুরু হয় সি দিয়ে। বর্তমানে যেসব প্রোগ্রামিং ল্যাঙ্গুয়েজ জনপ্রিয়তার শীর্ষে আছে সেসব গুলোর কোন না কোন অংশ সি থেকে নেওয়া হয়েছে। যেমনঃ সি++, পিএইচপি, জাভা, সি#…
ড্যানিস রিচি (১৯৬৯ – ১৯৭২ সালের মধ্যে)AT&T ল্যাবরেটরীতে সি ডেভেলপ করেন। সি প্রোগ্রামিং ল্যাঙ্গুয়েজ তৈরি করার প্রধান উদ্দেশ্য ছিল ইউনিক্স অপারেটিং সিস্টেম। সি প্রোগ্রামিং এর সম্পর্কে আরো বিস্তারিত জানতে চাইলে এখানে দেখতে পারেন
এই পোষ্ট থেকে আমি নিয়মিত সি প্রোগ্রামিং ল্যাঙ্গুয়েজ সম্পর্কে আপনাদের ধারনা দেওয়ার চেষ্টা করব। আশাকরি সবগুলো পোষ্ট শেষ হলে আপনারা সি প্রোগ্রামিং সম্পর্কে ভাল একটা ধারনা পাবেন এবং সি প্রোগ্রামিং ল্যাঙ্গুয়েজ ব্যবহার করে নিজ থেকে প্রোগ্রাম লিখতে পারবেন।
সি প্রোগ্রামিং শুরু করার আগে আপনাদেরকে কে একটা কম্পাইলার ডাউনলোড করতে হবে। সি প্রোগ্রামিং এর জন্য কয়েকটা ভাল কম্পাইলার আছে, নিচে আমি দুইটা কম্পাইলারের ডাউনলোড লিংক দিলাম, আপনাদের পছন্দ অনুযায়ী যে কোন একটা কম্পাইলার ডাউনলোড করতে পারেনঃ আমি দুইটা কম্পাইলারে কিভাবে সোর্সকোড কম্পাইল করতে হয় বলে দিব।
১। Code::Blocks 
২। Orwell Dev C++
কম্পাইলার কি এবং কেন লাগে?
কম্পাইলার হল একটা সফটওয়্যার যেটা প্রোগ্রামিং ল্যাঙ্গুয়েজের সোর্সকোডকে মেশিন লেভেল কোডে কনভার্ট করে।
প্রোগ্রাম কম্পাইল না করলে কি হয়?
আপনি যখন একটা প্রোগ্রাম লিখবেন তখন মেশিনকে অবশ্যই বুঝতে হবে আপনার কোডটা কি কাজ করবে। মেশিন যদি আপনার কোড না বুঝে তাহলে কোড লিখে লাভটাই কি!!
মেশিন 0 এবং 1 ছাড়া আর কিছু বুঝে না। এখন আপনার কোডটা মেশিনকে বুঝাতে হলে মেশিন যেভাবে বুঝে ঠিক ঐইভাবে আপনার কোড কনভার্ট করতে হবে। আপনার হয়ে সে কাজটা করার জন্য কম্পাইলার ব্যবহার করতে হবে।
সিনট্যাক্সঃ প্রতিটি প্রোগ্রামিং ল্যাঙ্গুয়েজের একটা নির্দিষ্ট সিনট্যাক্স থাকে। সি প্রোগ্রামিং এর জন্য একেবারে সহজ সিনট্যাক্স হলঃ
1
2
3
4
5
6
<header files>
int main()
{
    //your task goes here
    return 0;
}
মনে রাখার সুবিধার্তেঃ
একটা সি প্রোগ্রামের সোর্সকোডে এক বা একাধিক হেডার ফাইলস থাকবে। একটা মেইন ফাংশন থাকবে। মেইন ফাংশনের মধ্যে প্রোগ্রামটা কি কাজ করবে সেগুলো কোড হিসেবে লেখা হবে।
হেডার ফাইলস কেন লাগে?
আপনারা যারা আগে কোন প্রোগ্রামিং ল্যাঙ্গুয়েজ শিখেছেন তারা এটা জানেন যে প্রোগ্রামে অনেকগুলো ফাংশন ব্যবহার করতে হয়, যার কিছু প্রোগ্রামিং ল্যাঙ্গুয়েজের নিজস্ব এবং কিছু ব্যবহারকারী নিজেই তৈরি করে। প্রোগ্রামিং ল্যাঙ্গুয়েজের নিজস্ব ফাংশনগুলো ব্যবহার করার জন্য হেডার ফাইলস লাগে। আর ব্যবহারকারী নিজে যেসব ফাংশন তৈরি করে সেগুলোর জন্য লাগে প্রটোটাইপ।
ফাংশন কি? কিভাবে ব্যবহার করা হয়? ব্যবহারকারী কিভাবে ফাংশন তৈরি করে? তা আমরা অন্য কোন পোষ্টে শিখব।
মেইন ফাংশনের কেন লাগে?
মেইন ফাংশনকে আপনি প্রোগ্রামিং ল্যাঙ্গুয়েজের হার্ট বলতে পারবেন। কারন কম্পাইলার যখন কম্পাইল শুরু করে তখন প্রথমে সেটা প্রোগ্রামের মেইন ফাংশন কোথায় আছে তা দেখে এবং মেইন ফাংশন থেকে সোর্সকোড কম্পাইল শুরু করে।
সি প্রোগ্রামিং এ তোমার আপনার প্রথম প্রোগ্রামঃ
আশাকরি আপনারা কম্পাইলার ডাউনলোড করেছেন। যারা Dev C++ ডাউনলোড করেছেন তারা File > New > Source File এ ক্লিক করুন অথবা শর্টকাট ctrl + N প্রেস করুন। তাহলে আপনার নিচের ছবির মত একটা ট্যাব পাবেন।
Dev C++
Dev C++

যারা Code::Blocks ডাউনলোড করেছেন তারা File > New > Empty File এ ক্লিক কর অথবা শর্টকাট ctrl + shift + N প্রেস করুন। তাহলে আপনার নিচের ছবির মত একটা ট্যাব পাবেন।
Codeblocks
Codeblocks

এরপর নিচের কোডটা লিখুন এবং ফাইলের ফরম্যাট .c দিয়ে সেইভ করুন।
*.c [উদাহরনঃ mycode.c program.c abcdef.c, … …]
কোডঃ
1
2
3
4
5
6
#include <stdio.h>
int main()
{
    printf("Hello World!! This is my first C Program\n");
return 0;
}
উপরের কোডটা লেখা হলে তোমার কোড এবার কম্পাইল করতে হবেঃ
যারা Dev C++ ব্যবহার করছেন তারা কম্পাইল করার জন্য Execute > Compile & Run এ ক্লিক করুন অথবা শর্টকাট F11 প্রেস করুন।
যারা Code::Blocks ব্যবহার করছেন তারা কম্পাইল করার জন্য Build > Build & Run এ ক্লিক করুন অথবা শর্টকাট F9 প্রেস করুন।
এরপর আপনার নিচের ছবির মত আউটপুট স্ক্রীন এবং আউটপুট দেখতে পাবেন।
Output Screen
উপরের কোডটা বুঝতে পারলে এবার আপনি নিজের নাম প্রিন্ট করার জন্য একটা কোড লেখার চেষ্টা করুন।
আশাকরি আপনারা এই পোষ্টটি বুঝতে পেরেছেন।

Sunday, November 27, 2016

What is the full form of C language?

The C we know as of today is ANSI C , which is the standardized version of the C that Dennis Ritchie had developed during 1969–73. Sometimes it is said that the 'C' stands for Compiler. C++ was till 1983 'C with Classes' (as named by Bjarne Stroustrup, its developer).

Sunday, August 14, 2016

Developing for Android - An Introduction

What is Android?

Android is the world's most popular operating system for mobile devices and tablets. It is an open source operating system, created by Google, and available to all kinds of developers with various expertise levels, ranging from rookie to professional.
(The term 'open source' sounds pretty familiar, doesn't it? Well, open-source means software with source available for modification and bound to an open source license agreement. More about open source terminology can be found here).
From a developer's perspective, Android is a Linux-based operating system for smartphones and tablets. It includes a touch screen user interface, widgets, camera, network data monitoring and all the other features that enable a cell phone to be called a smartphone. Android is a platform that supports various applications, available through the Android Play Store. The Android platform also allows end users to develop, install and use their own applications on top of the Android framework. The Android framework is licensed under the Apache License, with Android application developers holding the right to distribute their applications under their customized license.


Like most software, Android is released in versions. Google has also assigned names to its versions since April 2009. Below are all the versions of Android released to date:

Version No.NameFor:
1.0Android BetaPhone
1.1AndroidPhone
1.5CupcakePhone
1.6DonutPhone
2.0/2.1EclairPhone
2.2.xFroyoPhone
2.3.xGingerbreadPhone
3.xHoneycombTablet
4.0.xIce Cream SandwichPhone and Tablet
4.1/4.2Jelly BeanPhone and Tablet
As we can see in the table above, various versions of Android are supported on phones and tablets. There are umpteen Android devices available in the market from manufacturers like Samsung, HTC, Motorola and others. Google itself also has phones made in conjunction with OEMs, branded as the Nexus series.

Understanding Android

To begin development on Android even at the application level, I think it is paramount to understand the basic internal architecture. Knowing how things are arranged inside helps us understand the application framework better, so we can can design the application in a better way.
Android is an OS based on Linux. Hence, deep inside, Android is pretty similar to Linux. To begin our dive into the Android internals, let us look at an architectural diagram.
architecture diagram The above diagram illustrates the Android architecture. As you can see, it is a software stack above the hardware that is provided by the OEMs. Let's start with the topmost layer, i.e., the applications.

Applications

The diagram shows four basic apps (App 1, App 2, App 3 and App 4), just to give the idea that there can be multiple apps sitting on top of Android. These apps are like any user interface you use on Android; for example, when you use a music player, the GUI on which there are buttons to play, pause, seek, etc is an application. Similarly, is an app for making calls, a camera app, and so on. All these apps are not necessarily from Google. Anyone can develop an app and make it available to everyone through Google Play Store. These apps are developed in Java, and are installed directly, without the need to integrate with Android OS.

Application Framework

Scratching further below the applications, we reach the application framework, which application developers can leverage in developing Android applications. The framework offers a huge set of APIs used by developers for various standard purposes, so that they don't have to code every basic task.The framework consists of certain entities; major ones are:
  • Activity Manager This manages the activities that govern the application life cycle and has several states. An application may have multiple activities, which have their own life cycles. However, there is one main activity that starts when the application is launched. Generally, each activity in an application is given a window that has its own layout and user interface. An activity is stopped when another starts, and gets back to the window that initiated it through an activity callback.
  • Notification Manager This manager enables the applications to create customized alerts
  • Views Views are used to create layouts, including components such as grids, lists, buttons, etc.
  • Resource Managers Applications do require external resources, such as graphics, external strings, etc. All these resources are managed by the resource manager, which makes them available in a standardized way.
  • Content Provider Applications also share data. From time to time, one application may need some data from another application. For example, an international calling application will need to access the user's address book. This access to another application's data is enabled by the content providers.

Libraries

This layer holds the Android native libraries. These libraries are written in C/C++ and offer capabilities similar to the above layer, while sitting on top of the kernel. A few of the major native libraries include
  • Surface Manager: Manages the display and compositing window-ing manager. - Media framework: Supports various audio and video formats and codecs including their playback and recording.
  • System C Libraries: Standard C library like libc targeted for ARM or embedded devices.
  • OpenGL ES Libraries : These are the graphics libraries for rendering 2D and 3D graphics.
  • SQLite : A database engine for Android.

Android Runtime

The Android runtime consists of the Dalvik Virtual Machine. It is basically a virtual machine for embedded devices, which like any other virtual machine is a bytecode interpreter. When we say it is for embedded devices, it means it is low on memory, comparatively slower and runs on battery power. Besides the Dalvik Virtual Machine, it also consists of the core libraries, which are Java libraries and are available for all devices.

Kernel

The Android OS is derived from Linux Kernel 2.6 and is actually created from Linux source, compiled for mobile devices. The memory management, process management etc. are mostly similar. The kernel acts as a Hardware Abstraction Layer between hardware and the Android software stack.

Android SDK

As already mentioned, Android is open source and hence the source code is available for all developers. In totality it is called the Android SDK. You can download, build and work on Android in a number of different ways--it all depends on what you want to do. If your goal is to develop an Android application, you don't necessarily need to download all the source. Google recommends the Eclipse IDE, for which there is an available Android Developer Tools (ADT) plugin, through which you can install the specific SDK, create projects, launch emulators, debug, etc. You can see more details of Eclipse and ADT through Android's official website for developers - http://developer.android.com/sdk/index.html

Android Development for Windows Users

Android as of now does not support building on Windows, so if you want to modify the Android OS itself, you'll have to use Linux (see building the Android OS). However, on Windows, we do have tools and plugins for application and native Android development. And here we will talk about setting up basic Android development tools on Windows.

Downloading the Android SDK and developer tools

Google provides a convenient bundle to download and setup Android for Windows developers, which you can download here, under the name ADT bundle for Windows. The exact name of the file you download will depend on your OS architecture (32 vs 64 bit), but for my case (64 Bit Win 7), I see the following zip file downloaded: adt-bundle-windows-x86_64.zip. Extracting the zip file, I have contents as in the following snapshot:

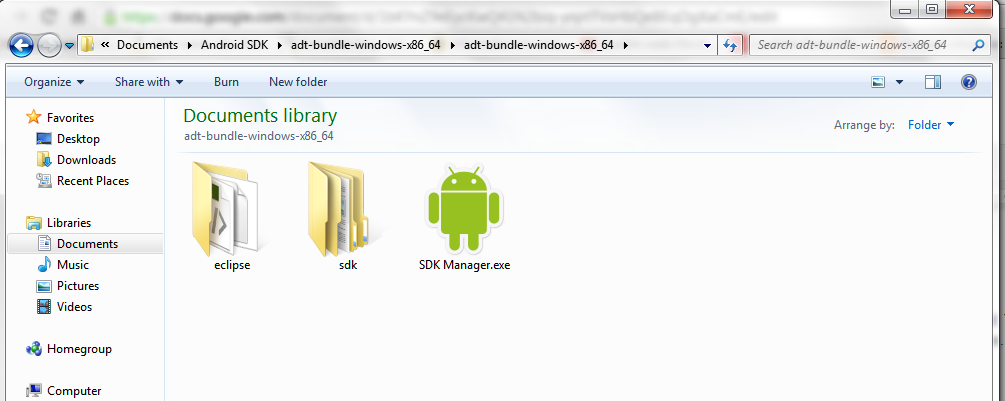
First of all, we have Eclipse, which is the IDE for writing source. As an IDE it provides the environment for developing Android Applications. Android Applications are developed primarily in Java. Next we have the 'sdk', which does not include any of the source. However, it holds the already built platform tools, tools, images and some platform specific libraries. When we say, building Android is not supported on Windows,we mean that we can't compile system images and tools. However, other sources needed for application development are be available through the SDK Manager, which is the third entity present in the extracted zip file.
So, let's download the sources! Double click the SDKManager.exe. You'll see something like this:

This is the SDK Manager, via which we can install or delete whatever version of SDK we want. As you can see, it mentions we have the Android SDK Tools and Android SDK Platform Tools installed.
The latest Android available, as of the writing of this article, is 4.2, but with the SDK we can download and install any of the previous versions too. Now let us play around with the latest Android--i.e.,4.2, which is also known as Jelly Bean.
Select the check box for "Android 4.2(API 17)", which will select everything required for and under Android 4.2.


In all, as we can see, SDK Manager found 6 packages that need installation. Click the "Install 6 packages" button. We see another dialog box for package descriptions and license.


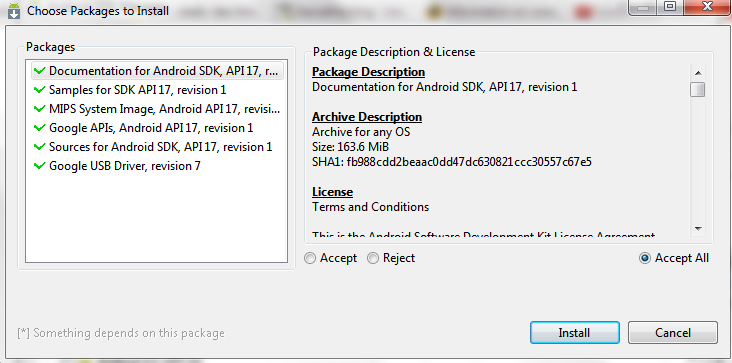
Select "Accept All" and click Install, which will initiate the download and then installation. When done, you will see "Installed" in front of all the packages selected.
It's now time to launch Eclipse, but first, we need to make sure that we have the Java Developer Kit (JDK) installed. If you don't have it, you can download it from Oracle here. I have JDK 7 installed in my case. Next, we need to launch Eclipse from the executable present in the Eclipse directory . If we obtained Eclipse via the instructions in this article, it should already have the ADT plugin installed. (Otherwise, you can download the ADT separately by following the instructions here.) Eclipse generally asks for a workspace path where it will create and maintain projects.
Here is what the newly launched Eclipse looks like:


Eclipse also includes the SDK Manager from where you can manage the SDK packages. Check out the Window menu and select "Android SDK Manager". To see what the emulator looks like, go to the Window menu and select "Android Virtual Device Manager". From there, we can create our virtual device or use one of the standard devices available. To create a new virtual device, click on 'New' as we see in the following snapshot:


Another window will pop up to take inputs for device type, target processor, memory, etc.


You can provide customized device specifications for a virtual device. Once the device is created by clicking 'OK', it will be available in the list on "Android Virtual Device Manager" window. To launch the emulator for your own defined virtual device, select it and click "Start".
You can also select pre-loaded options that correspond to the specifications of existing Android devices. To see them in the Android Virtual Device Manager, go to the Device Definitions tab.


We select the first in our list, "Nexus S by Google", and add a virtual device by clicking "Create AVD". The following dialog box requires the "Target" and "CPU" to be specified along with the size of the SD Card.

We will assign Target as "Android 4.2 - API level 17" CPU as "ARM" and SD Card Size equals "1024 MiB" and click "OK". We can now see the newly defined virtual device in the AVD list


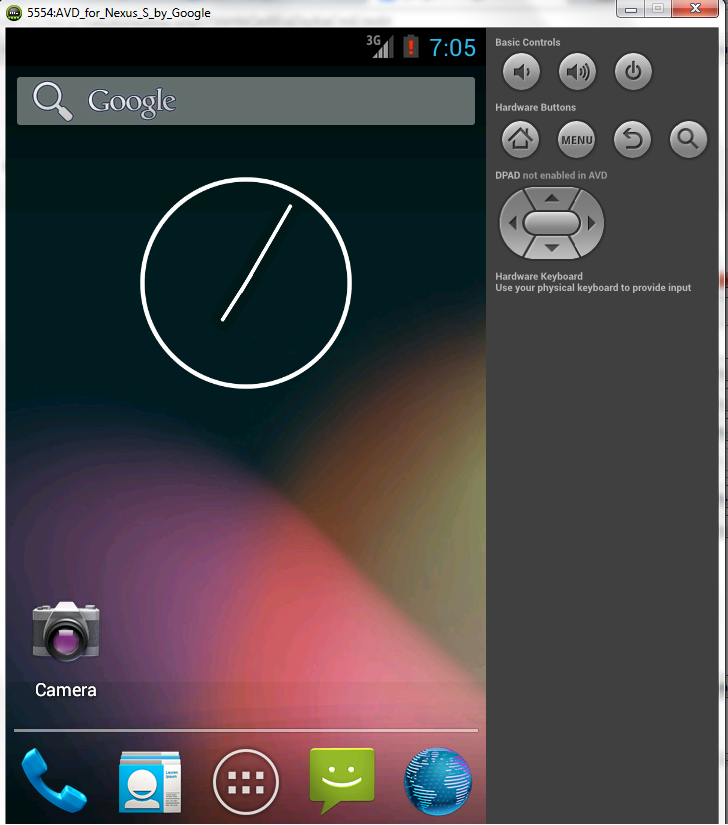
To launch the emulator, select it and click "Start". Here's what the emulator looks like:


We can now use our newly-created emulator for running our Windows Android apps. All we have to do is compile our code, then load the app onto the emulator.

Building the Android OS

The above instructions, for Windows users, will work great if all you want to do is create Android apps. However, you can do even more with Android, including modifying the Android OS to create Android ROMs or MODs--that's the beauty of open source! To do this, you'll need to download the complete available Android source from its repository and cross-compiling for the device. You'll also need to be using Linux, since building Android is not supposed on Windows machines. And before we move further, there are certain assumptions to get out of the way:
1. All the information is generic and should work for all Linux flavours, however these instructions have only been tried and tested on Ubuntu 11.04.
2. Because we had to pick one of the versions of Android, we chose Android 4.0.1. Hence, some commands might be specific to Android 4.0.1, but things might be slightly different for other versions.

Memory Requirements

It is always a wise idea to check the memory requirements before starting any project. The size of the Android SDK is around 8.5GB and you will need around 30GB free disk space to build it.

Prerequisite Installations

Prior to downloading the SDK and starting cross-compiling, there are certain prerequisites of the Android SDK we have to have. It is better to set up these before jumping into the Android SDK, as we all know prevention is much better than debugging! First of all, for the Android version we have chosen (i.e Android 4.0.1) cross compilation is well tested on 64 -bit machines, but the documentation says it is experimental on 32-bit machines.
1. JDK Android SDK building requires the JDK, so you must install the JDK. For Android versions 2.3.x and later, one needs to install Java 6. It is recommend to install Sun JDK only, rather than Open JDK.. First, download the JDK 6. Then run the following commands. (Please Note: To avoid specifying a specific version, the installer binary name and directories are modified to be generic names.)
$ chmod +x jdk-6xxxx-linux-xxx.bin
$ sudo ./jdk-6xxxx-linux-xxx.bin
$ sudo mv jdk1.6.xxxx /usr/lib/jvm/
 
$sudo update-alternatives --install /usr/bin/java java /usr/lib/jvm/jdk1.6.xxxx/bin/java 1
$ sudo update-alternatives --install /usr/bin/javac javac /usr/lib/jvm/jdk1.6.xxxx/bin/javac 1
$ sudo update-alternatives --install /usr/bin/javaws javaws /usr/lib/jvm/jdk1.6.xxxx/bin/javaws 1
 
$ sudo update-alternatives --config java
$ sudo update-alternatives --config javac
$ sudo update-alternatives --config javaws
For versions prior to 2.3.x, Java 5 is required. 2. You also need to install the following packages:
$sudo apt-get install git-core gnupg flex bison gperf libsdl-dev libesd0-dev libwxgtk2.6-dev build-essential zip curl  
libncurses5-dev zlib1g-dev ant gcc-multilib g++-multilib
$sudo apt-get install libx11-dev:i386
These packages are needed for downloading and compiling the SDK. Once these get installed, you are ready to download the Android SDK. There may be some optional things to do, for example enabling caching, etc. But we will not go into much detail here as we don't really need to do those things.

Downloading the Android SDK

The entire Android SDK is stored in a git repository that also maintains various other versions as well. We need to know the repository path and then download to a separate directory where we wish to store the complete source.
Let us first create a root source directory.
$mkdir android
Further, we will initialise and configure a tool 'repo', which is used to work with git conveniently. To download it, we need a 'bin' directory in our home, which should be added to the path.
$mkdir bin
$export PATH=$PATH:~/bin
$curl https://dl-ssl.google.com/dl/googlesource/git-repo/repo > bin/repo
$chmod a+x bin/repo
Now we have the repo installed and must initialise it with the path of git where the Android SDK lies. There is a master branch of git, which holds the latest Android version. The master branch in git is the main source repository, which means any new release or new update would be part of this master branch. However, if we want a specific Android version, we need to initialise with a specific branch.
Here in this article, we will go for a specific branch, since the master will keep on changing.
$repo init -u https://android.googlesource.com/platform/manifest -b android-4.0.1_r1
It will ask you for a name and email id, and you must provide them.
To get all the Android SDK files, you just now need to do:
$repo sync
It may take some time to download the complete source. In the end, we get
Syncing work tree: 100% (221/221), done. 
This indicates the sources are downloaded. Let's have a look at the folder structure from the topmost level; here is what I have:
$ls
abi       build   development  external    libcore   packages  system
bionic    cts     device       frameworks  Makefile  prebuilt
bootable  dalvik  docs         hardware    ndk       sdk

Building Android

Now that we have the source, the next step is to build it. The first thing we need to determine before building is what platform are we going to run this Android on? It is essential to determine this. The options could be the type of your device, or an emulator.
When flashing a phone, the worst case it that you may brick the phone in the event of a critical bug. As a result, it is a good idea to develop on Android through an emulator--so we'll do that.
First of all, we need to set the environment variables, which are specified in a shell script.
$ source build/envsetup.sh
including device/samsung/maguro/vendorsetup.sh
including device/samsung/tuna/vendorsetup.sh
including device/ti/panda/vendorsetup.sh
including sdk/bash_completion/adb.bash
Next, we need to specify the target for which we need to cross-compile, using the command 'lunch'. But first of all, what is cross-compiling and why we need to do it? Well, cross-compiling is a compiling process that is done for a different platform, to create an executable or library to be used on a that different platform. Therefore, we would have two platforms,
  • host : On which we have the sources and are being cross-compiled. In our case, this is our Linux machine.
  • target: The platform for which the sources are being compiled for, and the compiled image or library will be used on the target platform. In this case, this would be our Android emulator.
This is required for embedded systems, as not all platforms support compiling and debugging. Examples of such platforms are ARM, MIPS, etc. For the target emulator and development build, we do
$lunch full-eng
============================================
PLATFORM_VERSION_CODENAME=REL
PLATFORM_VERSION=4.0.1
TARGET_PRODUCT=full
TARGET_BUILD_VARIANT=eng
TARGET_BUILD_TYPE=release
TARGET_BUILD_APPS=
TARGET_ARCH=arm
TARGET_ARCH_VARIANT=armv7-a
HOST_ARCH=x86
HOST_OS=linux
HOST_BUILD_TYPE=release
BUILD_ID=ITL41D
============================================
Here 'full' is for emulator and 'eng' is because we want a development build. To see other available options, do:
$lunch
You're building on Linux

Lunch menu... pick a combo:
     1. full-eng
     2. full_x86-eng
     3. vbox_x86-eng
     4. full_maguro-userdebug
     5. full_tuna-userdebug
     6. full_panda-en
Next, we just have to build the code using 'make'. GNU make has the ability to run parallel tasks. How many tasks to run in parallel is determined by the '-j' option. The usage is make -jN, where N is the number For example, to run 4 parallel tasks, our command would be
$make -j4
It is common to set this number between 1 to 2 times the number of hardware threads the computer supports, which is generally the number of processors. To know how many processors we have in our system, we need to peek into the cpuinfo. To get the CPU info, we have command
$cat /proc/cpuinfo
However, to get to know the number of processors in a single command, we can use
$grep -c ^processor /proc/cpuinfo
The building of Android also takes quite a lot of time when done for the first time. Note, all the images, libraries and applications built are placed in the directory out/target/product/generic/

Running on the Emulator

To launch the emulator with our built Android, just run the following command
$emulator
This will automatically pick the built images and binaries for the recently built Android. You can have the look and feel of the emulator environment, which is pretty similar to a device.

Conclusion

This article covers the basics to understand Android, and a pragmatic approach to understanding the SDK and get it working after building it. In future articles, we'll talk more about the details of development in Android for native libraries and apps including how to write a native Android application.

Monday, August 8, 2016

Programming Choices for Windows 8

Developers have multiple API choices to program sensors on Win8. The new touch-friendly app environment, called "Windows UI apps" is shown on the left in Figure 1. The only API library that Windows UI style apps can use is the completely new one called WinRT. The WinRT sensor API represents a portion of the overall WinRT library. For more details, please refer to: http://msdn.microsoft.com/en-us/library/windows/apps/windows.devices.sensors.aspx

Traditional Win Forms, or MFC-style apps, shown on the right, are now called "Desktop apps" because they run in the Desktop Windows Manager environment. Desktop apps can either use the native Win32/COM API or a .NET-style API.

In both cases, these APIs go through a Windows middleware component called the Windows Sensor Framework. The Windows Sensor Framework defines the Sensor Object Model. The different APIs "bind" to that object model in slightly different ways.


Figure 1: Windows UI and Desktop Sensor frameworks in Windows 8

Differences in the Desktop and Windows UI style application development will be discussed later in this document. For brevity, we will consider only Desktop app development. For Windows UI app development, please refer to http://msdn.microsoft.com/library/windows/apps/br211369


Sensors

There are many kinds of sensors, but we are interested in the ones required for Windows 8, namely accelerometers, gyroscopes, ambient light sensors, compass and GPS. Windows 8 represents the physical sensors with object-oriented abstractions. To manipulate the sensors, programmers use APIs to interact with the objects.

You may have noticed that there are more objects shown below (Figure 2) than actual hardware. Windows defines some "logical sensor" objects by combining information from multiple physical sensors. This is called "Sensor Fusion".


Figure 2: Different sensors supported on Windows 8


Sensor Fusion

The physical sensor chips have some inherent natural limitations. For example:

Accelerometers measure linear acceleration, which is a measurement of the combined relative motion and the force of Earth's gravity. If you want to know the computer's tilt, you'll have to do some mathematical calculations.
Magnetometers measure the strength of magnetic fields, which indicate the location of the Earth's Magnetic North Pole.
These measurements are subject to an inherent drift problem, which can be corrected by using raw data from the Gyro. Both measurements are (scaled) dependent upon the tilt of the computer from level with respect to the Earth's surface.

If you really want the computer's heading with respect to the Earth's True North Pole (Magnetic North Pole is in a different position and moves over time), you need to correct for that.

Sensor Fusion (Figure 3) is obtaining raw data from multiple physical sensors, especially the Accelerometer, Gyro, and Magnetometer, performing mathematical calculations to correct for natural sensor limitations, computing more human-usable data, and representing those as logical sensor abstractions. The application developer has to implement the necessary transformations required to translate physical sensor data to the abstract sensor data. If your system design has a SensorHub, the fusion operations will take place inside the microcontroller firmware. If your system design does not have a SensorHub, the fusion operations must be done inside one-or-more device drivers that the IHVs and/or OEMs provide.


Figure 3: Sensor fusion by combining output from multiple sensors


Identifying Sensors

To manipulate a sensor, you need a system to identify and refer to it. The Windows Sensor Framework defines a number of categories that sensors are grouped into. It also defines a large number of specific sensor types. Table 1 lists some of the sensors available for your Desktop application.

Table 1: Sensor types and categories

.All.
Biometric Electrical Environmental Light Location Mechanical Motion Orientation Scanner
Human Presence Capacitance Atmospheric Pressure Ambient Light Broadcast Boolean Switch Accelerometer 1D Compass 1D Barcode
Human Proximity* Current Humidity Gps* Boolean Switch Array Accelerometer 2D Compass 2D Rfid
Touch Electrical Power Temperature Static Force Accelerometer 3D Compass 3D
Inductance Wind Direction Multivalue Switch Gyrometer 1D Device Orientation*
Potentio-meter Wind Speed Pressure Gyrometer 2D Distance 1D
Resistance Strain Gyrometer 3D Distance 2D
Voltage Weight Motion Detector Distance 3D
Speedometer Inclinometer 1D
Inclinometer 2D
Inclinometer 3D*
The sensor types required by Windows 8 are shown in bold* font:

Accelerometer, Gyro, Compass, and Ambient Light are the required "real/physical" sensors
Device Orientation and Inclinometer are the required "virtual/fusion" sensors (note that the Compass also includes fusion-enhanced/tilt-compensated data)
GPS is a required sensor if you have a WWAN radio, otherwise GPS is optional
Human Proximity is an oft-mentioned possible addition to the required list, but, for now, it's not required.
The names of the categories and types shown in Table 1 are nice, human-readable forms. However, for programming, you'll need to know the programming constants for each type of sensor. All of these constants are actually just numbers called GUIDs (Globally Unique IDs). Below, in Table 2, is a sample of some of the sensor categories and types, the names of the constants for Win32/COM and .NET, and their underlying GUID values.

Table 2: Constants and unique Globally Unique IDs (GUIDs) for some common sensors

Identifier Constant (Win32/COM) Constant (.NET) GUID
Category .All. SENSOR_CATEGORY_ALL SensorCategories.SensorCategoryAll {C317C286-C468-4288-9975-D4C4587C442C}
Category Biometric SENSOR_CATEGORY_BIOMETRIC SensorCategories.SensorCategoryBiometric {CA19690F-A2C7-477D-A99E-99EC6E2B5648}
Category Electrical SENSOR_CATEGORY_ELECTRICAL SensorCategories.SensorCategoryElectrical {FB73FCD8-FC4A-483C-AC58-27B691C6BEFF}
Category Environmental SENSOR_CATEGORY_ENVIRONMENTAL SensorCategories.SensorCategoryEnvironmental {323439AA-7F66-492B-BA0C-73E9AA0A65D5}
Category Light SENSOR_CATEGORY_LIGHT SensorCategories.SensorCategoryLight {17A665C0-9063-4216-B202-5C7A255E18CE}
Category Location SENSOR_CATEGORY_LOCATION SensorCategories.SensorCategoryLocation {BFA794E4-F964-4FDB-90F6-51056BFE4B44}
Category Mechanical SENSOR_CATEGORY_MECHANICAL SensorCategories.SensorCategoryMechanical {8D131D68-8EF7-4656-80B5-CCCBD93791C5}
Category Motion SENSOR_CATEGORY_MOTION SensorCategories.SensorCategoryMotion {CD09DAF1-3B2E-4C3D-B598-B5E5FF93FD46}
Category Orientation SENSOR_CATEGORY_ORIENTATION SensorCategories.SensorCategoryOrientation {9E6C04B6-96FE-4954-B726-68682A473F69}
Category Scanner SENSOR_CATEGORY_SCANNER SensorCategories.SensorCategoryScanner {B000E77E-F5B5-420F-815D-0270ª726F270}
Type HumanProximity SENSOR_TYPE_HUMAN_PROXIMITY SensorTypes.SensorTypeHumanProximity {5220DAE9-3179-4430-9F90-06266D2A34DE}
Type AmbientLight SENSOR_TYPE_AMBIENT_LIGHT SensorTypes.SensorTypeAmbientLight {97F115C8-599A-4153-8894-D2D12899918A}
Type Gps SENSOR_TYPE_LOCATION_GPS SensorTypes.SensorTypeLocationGps {ED4CA589-327A-4FF9-A560-91DA4B48275E}
Type Accelerometer3D SENSOR_TYPE_ACCELEROMETER_3D SensorTypes.SensorTypeAccelerometer3D {C2FB0F5F-E2D2-4C78-BCD0-352A9582819D}
Type Gyrometer3D SENSOR_TYPE_GYROMETER_3D SensorTypes.SensorTypeGyrometer3D {09485F5A-759E-42C2-BD4B-A349B75C8643}
Type Compass3D SENSOR_TYPE_COMPASS_3D SensorTypes.SensorTypeCompass3D {76B5CE0D-17DD-414D-93A1-E127F40BDF6E}
Type DeviceOrientation SENSOR_TYPE_DEVICE_ORIENTATION SensorTypes.SensorTypeDeviceOrientation {CDB5D8F7-3CFD-41C8-8542-CCE622CF5D6E}
Type Inclinometer3D SENSOR_TYPE_INCLINOMETER_3D SensorTypes.SensorTypeInclinometer3D {B84919FB-EA85-4976-8444-6F6F5C6D31DB}
These are the most commonly used GUIDs-there are many more you can explore. At first you might think that the GUIDs are silly and tedious, but there is one good reason for using them: extensibility. Since the APIs don't care about the actual sensor names (they just pass GUIDs around), it is possible for vendors to invent new GUIDs for "value add" sensors.


Generating New GUIDs

Microsoft provides a tool in Visual Studio that allows anyone to generate new GUIDs. Figure 4 shows a screenshot from Visual Studio for doing this. All the vendor has to do is publish them, and new functionality can be exposed without the need to change the Microsoft APIs or any operating system code at all.


Figure 4: Defining new GUIDs for value add sensors


Using Sensor Manager Object


Ask by Type

Your app can ask for a specific type of sensor, such as Gyrometer3D. The Sensor Manager consults the list of sensor hardware present on the computer and returns a collection of matching objects bound to that hardware. Although the Sensor Collection may have 0, 1, or more objects, it usually has only one. Below is a C++ code sample illustrating the use of the Sensor Manager object's GetSensorsByType method to search for 3-axis Gyros and return them in a Sensor Collection. Note that you have to ::CoCreateInstance() the Sensor Manager Object first.

?
1
2
3
4
5
6
7
8
9
10
11
12
13
14
15
16
17
18
19
20
21
22
23
// Additional includes for sensors
#include <InitGuid.h>
#include <SensorsApi.h>
#include <Sensors.h>
// Create a COM interface to the SensorManager object.
ISensorManager* pSensorManager = NULL;
HRESULT hr = ::CoCreateInstance(CLSID_SensorManager, NULL, CLSCTX_INPROC_SERVER,
    IID_PPV_ARGS(&pSensorManager));
if (FAILED(hr))
{
    ::MessageBox(NULL, _T("Unable to CoCreateInstance() the SensorManager."),
        _T("Sensor C++ Sample"), MB_OK | MB_ICONERROR);
    return -1;
}
// Get a collection of all motion sensors on the computer.
ISensorCollection* pSensorCollection = NULL;
hr = pSensorManager->GetSensorsByType(SENSOR_TYPE_GYROMETER_3D, &pSensorCollection);
if (FAILED(hr))
{
    ::MessageBox(NULL, _T("Unable to find any Gyros on the computer."),
        _T("Sensor C++ Sample"), MB_OK | MB_ICONERROR);
    return -1;
}

Ask by Category

Your app can ask for sensors by category, such as all motion sensors. The Sensor Manager consults the list of sensor hardware on the computer and returns a collection of motion objects bound to that hardware. The SensorCollection may have 0, 1, or more objects in it. On most computers, the collection will have two motion objects: Accelerometer3D and Gyrometer3D.

The C++ code sample below illustrates the use of the Sensor Manager object's GetSensorsByCategory method to search for motion sensors and return them in a sensor collection.

?
1
2
3
4
5
6
7
8
9
10
11
12
13
14
15
16
17
18
// Additional includes for sensors
#include <InitGuid.h>
#include <SensorsApi.h>
#include <Sensors.h>
// Create a COM interface to the SensorManager object.
ISensorManager* pSensorManager = NULL;
HRESULT hr = ::CoCreateInstance(CLSID_SensorManager, NULL, CLSCTX_INPROC_SERVER, IID_PPV_ARGS(&pSensorManager));
if (FAILED(hr)) {
    ::MessageBox(NULL, _T("Unable to CoCreateInstance() the SensorManager."), _T("Sensor C++ Sample"), MB_OK | MB_ICONERROR);
    return -1;
}
// Get a collection of all motion sensors on the computer.
ISensorCollection* pSensorCollection = NULL;
hr = pSensorManager->GetSensorsByCategory(SENSOR_CATEGORY_MOTION, &pSensorCollection);
if (FAILED(hr)) {
    ::MessageBox(NULL, _T("Unable to find any Motion sensors on the computer."), _T("Sensor C++ Sample"), MB_OK | MB_ICONERROR);
    return -1;
}

Ask by Category "All"

In practice, the most efficient way is for your app to ask for all of the sensors on the computer. The Sensor Manager consults the list of sensor hardware on the computer and returns a collection of all the objects bound to that hardware. The Sensor Collection may have 0, 1, or more objects in it. On most computers, the collection will have seven or more objects.

C++ does not have a GetAllSensors call, so you must use GetSensorsByCategory(SENSOR_CATEGORY_ALL, .) instead as shown in the sample code below.

?
1
2
3
4
5
6
7
8
9
10
11
12
13
14
15
16
17
// Additional includes for sensors
#include <InitGuid.h>
#include <SensorsApi.h>
#include <Sensors.h>
// Create a COM interface to the SensorManager object. ISensorManager* pSensorManager = NULL;
HRESULT hr = ::CoCreateInstance(CLSID_SensorManager, NULL, CLSCTX_INPROC_SERVER, IID_PPV_ARGS(&pSensorManager));
if (FAILED(hr)) {
    ::MessageBox(NULL, _T("Unable to CoCreateInstance() the SensorManager."), _T("Sensor C++ Sample"), MB_OK | MB_ICONERROR);
    return -1;
}
// Get a collection of all sensors on the computer.
ISensorCollection* pSensorCollection = NULL;
hr = pSensorManager->GetSensorsByCategory(SENSOR_CATEGORY_ALL, &pSensorCollection);
if (FAILED(hr)) {
    ::MessageBox(NULL, _T("Unable to find any sensors on the computer."), _T("Sensor C++ Sample"), MB_OK | MB_ICONERROR);
    return -1;
}

Sensor Life Cycle - Enter and Leave Events

On Windows, as with most hardware devices, sensors are treated as Plug and Play devices. At first you might say, "The sensors are hard-wired on the computer's motherboard, why do we have to worry about Plug and Play if they'll never be plugged in or unplugged?" There are a few different scenarios where it occurs:

1. It is possible to have USB-based sensors external to the system and plugged into a USB port.

2. It is conceivable to have sensors that are attached by an unreliable wireless interface (such as Bluetooth) or wired interface (such as Ethernet), where connects and disconnects happen.

3. If and when Windows Update upgrades the device driver for the sensors, they appear to disconnect and then reconnect.

4. When Windows shuts down (to S4 or S5), the sensors appear to disconnect.

In the context of sensors, a Plug and Play connect is called an Enter event, and disconnect is called a Leave event. Resilient apps need to be able to handle both.


Enter Event Callback

Your app may already be running at the time a sensor is plugged in. When this happens, the Sensor Manager reports the sensor Enter event. Note: if the sensors are already plugged in when your app starts running, you will not get Enter events for those sensors. In C++/COM, you must use the SetEventSink method to hook the callback. The callback cannot simply be a function, it must be an entire class that inherits from ISensorManagerEvents, and also implements IUnknown. The ISensorManagerEvents interface must have callback function implementations for:

STDMETHODIMP OnSensorEnter(ISensor *pSensor, SensorState state);

?
1
2
3
4
5
6
7
8
9
10
11
12
13
14
15
16
17
18
// Hook the SensorManager for any SensorEnter events.
pSensorManagerEventClass = new SensorManagerEventSink();  // create C++ class instance
// get the ISensorManagerEvents COM interface pointer
HRESULT hr = pSensorManagerEventClass->QueryInterface(IID_PPV_ARGS(&pSensorManagerEvents));
if (FAILED(hr))
{
    ::MessageBox(NULL, _T("Cannot query ISensorManagerEvents interface for our callback class."),
        _T("Sensor C++ Sample"), MB_OK | MB_ICONERROR);
    return -1;
}
// hook COM interface of our class to SensorManager eventer
hr = pSensorManager->SetEventSink(pSensorManagerEvents);
if (FAILED(hr))
{
    ::MessageBox(NULL, _T("Cannot SetEventSink on SensorManager to our callback class."),
        _T("Sensor C++ Sample"), MB_OK | MB_ICONERROR);
    return -1;
}
Code: Hook Callback for Enter event

Below is the C++/COM equivalent of the Enter callback. You would normally perform all the initialization steps from your main loop in this function. In fact, it is more efficient to refactor your code so your main loop merely calls OnSensorEnter to simulate an Enter event.

?
1
2
3
4
5
6
7
8
9
10
11
12
13
14
15
16
17
18
19
20
21
22
23
24
STDMETHODIMP SensorManagerEventSink::OnSensorEnter(ISensor *pSensor, SensorState state)
{
    // Examine the SupportsDataField for SENSOR_DATA_TYPE_LIGHT_LEVEL_LUX.
    VARIANT_BOOL bSupported = VARIANT_FALSE;
    HRESULT hr = pSensor->SupportsDataField(SENSOR_DATA_TYPE_LIGHT_LEVEL_LUX, &bSupported);
    if (FAILED(hr))
    {
        ::MessageBox(NULL, _T("Cannot check SupportsDataField for SENSOR_DATA_TYPE_LIGHT_LEVEL_LUX."),
            _T("Sensor C++ Sample"), MB_OK | MB_ICONINFORMATION);
        return hr;
    }
    if (bSupported == VARIANT_FALSE)
    {
        // This is not the sensor we want.
        return -1;
    }
    ISensor *pAls = pSensor;  // It looks like an ALS, memorize it.
    ::MessageBox(NULL, _T("Ambient Light Sensor has entered."),
        _T("Sensor C++ Sample"), MB_OK | MB_ICONINFORMATION);
    .
    .
    .
    return hr;
}
Code: Callback for Enter event


Leave Event

The individual sensor reports when the Leave event happens (not the Sensor Manager). This code is actually the same as the previous hook callback for an Enter event.

?
1
2
3
4
5
6
7
8
9
10
11
12
13
14
15
16
17
18
// Hook the Sensor for any DataUpdated, Leave, or StateChanged events.
SensorEventSink* pSensorEventClass = new SensorEventSink();  // create C++ class instance
ISensorEvents* pSensorEvents = NULL;
// get the ISensorEvents COM interface pointer
HRESULT hr = pSensorEventClass->QueryInterface(IID_PPV_ARGS(&pSensorEvents));
if (FAILED(hr))
{
    ::MessageBox(NULL, _T("Cannot query ISensorEvents interface for our callback class."),
        _T("Sensor C++ Sample"), MB_OK | MB_ICONERROR);
    return -1;
}
hr = pSensor->SetEventSink(pSensorEvents); // hook COM interface of our class to Sensor eventer
if (FAILED(hr))
{
    ::MessageBox(NULL, _T("Cannot SetEventSink on the Sensor to our callback class."),
        _T("Sensor C++ Sample"), MB_OK | MB_ICONERROR);
    return -1;
}
Code: Hook Callback for Leave event

The OnLeave event handler receives the ID of the leaving sensor as an argument.

?
1
2
3
4
5
6
7
8
9
10
STDMETHODIMP SensorEventSink::OnLeave(REFSENSOR_ID sensorID)
{
    HRESULT hr = S_OK;
    ::MessageBox(NULL, _T("Ambient Light Sensor has left."),
        _T("Sensor C++ Sample"), MB_OK | MB_ICONINFORMATION);
    // Perform any housekeeping tasks for the sensor that is leaving.
    // For example, if you have maintained a reference to the sensor,
    // release it now and set the pointer to NULL.
    return hr;
}
Code: Callback for Leave event


Picking Sensors for Your App

We care about sensors because of what they tell us. Different types of sensors tell us different things. Microsoft calls these pieces of information Data Fields, and they are grouped together in a SensorDataReport. Your computer may (potentially) have more than one type of sensor that can tell your app the information you care about. Your app probably doesn't care which sensor it gets the information from, so long as it can get it.

Table 3 shows the constant names for the most commonly used Data Fields for Win32/COM and.NET. Just like sensor identifiers, these constants are just human-readable names for what are really just big numbers underneath. This provides for extensibility of Data Fields beyond the "well known" ones Microsoft has pre-defined. There are many other "well known" IDs for you to explore.

Table 3: Data Field identifier constants

Constant (Win32/COM) Constant (.NET) PROPERTYKEY (GUID,PID)
SENSOR_DATA_TYPE_TIMESTAMP SensorDataTypeTimestamp {DB5E0CF2-CF1F-4C18-B46C-D86011D62150},2
SENSOR_DATA_TYPE_LIGHT_LEVEL_LUX SensorDataTypeLightLevelLux {E4C77CE2-DCB7-46E9-8439-4FEC548833A6},2
SENSOR_DATA_TYPE_ACCELERATION_X_G SensorDataTypeAccelerationXG {3F8A69A2-07C5-4E48-A965-CD797AAB56D5},2
SENSOR_DATA_TYPE_ACCELERATION_Y_G SensorDataTypeAccelerationYG {3F8A69A2-07C5-4E48-A965-CD797AAB56D5},3
SENSOR_DATA_TYPE_ACCELERATION_Z_G SensorDataTypeAccelerationZG {3F8A69A2-07C5-4E48-A965-CD797AAB56D5},4
SENSOR_DATA_TYPE_ANGULAR_VELOCITY_X_DEG
REES_PER_SECOND SensorDataTypeAngularVelocityXDegreesPerSecond {3F8A69A2-07C5-4E48-A965-CD797AAB56D5},10
SENSOR_DATA_TYPE_ANGULAR_VELOCITY_X_DE
GREES_PER_SECOND SensorDataTypeAngularVelocityXDegreesPerSecond {3F8A69A2-07C5-4E48-A965-CD797AAB56D5},10
SENSOR_DATA_TYPE_ANGULAR_VELOCITY_Y_DE
GREES_PER_SECOND SensorDataTypeAngularVelocityYDegreesPerSecond {3F8A69A2-07C5-4E48-A965-CD797AAB56D5},11
SENSOR_DATA_TYPE_ANGULAR_VELOCITY_Y_DE
GREES_PER_SECOND SensorDataTypeAngularVelocityYDegreesPerSecond {3F8A69A2-07C5-4E48-A965-CD797AAB56D5},11
SENSOR_DATA_TYPE_ANGULAR_VELOCITY_Z_DE
GREES_PER_SECOND SensorDataTypeAngularVelocityZDegreesPerSecond {3F8A69A2-07C5-4E48-A965-CD797AAB56D5},12
SENSOR_DATA_TYPE_TILT_X_DEGREES SensorDataTypeTiltXDegrees {1637D8A2-4248-4275-865D-558DE84AEDFD},2
SENSOR_DATA_TYPE_TILT_Y_DEGREES SensorDataTypeTiltYDegrees {1637D8A2-4248-4275-865D-558DE84AEDFD},3
SENSOR_DATA_TYPE_TILT_Z_DEGREES SensorDataTypeTiltZDegrees {1637D8A2-4248-4275-865D-558DE84AEDFD},4
SENSOR_DATA_TYPE_MAGNETIC_HEADING_COM
PENSATED_MAGNETIC_NORTH_DEGREES SensorDataTypeMagneticHeadingCompensated
TrueNorthDegrees {1637D8A2-4248-4275-865D-558DE84AEDFD},11
SENSOR_DATA_TYPE_MAGNETIC_FIELD_STRENGTH
_X_MILLIGAUSS SensorDataTypeMagneticFieldStrengthXMilligauss {1637D8A2-4248-4275-865D-558DE84AEDFD},19
SENSOR_DATA_TYPE_MAGNETIC_FIELD_STRENGTH
_Y_MILLIGAUSS SensorDataTypeMagneticFieldStrengthYMilligauss {1637D8A2-4248-4275-865D-558DE84AEDFD},20
SENSOR_DATA_TYPE_MAGNETIC_FIELD_STRENGTH
_Z_MILLIGAUSS SensorDataTypeMagneticFieldStrengthZMilligauss {1637D8A2-4248-4275-865D-558DE84AEDFD},21
SENSOR_DATA_TYPE_QUATERNION SensorDataTypeQuaternion {1637D8A2-4248-4275-865D-558DE84AEDFD},17
SENSOR_DATA_TYPE_ROTATION_MATRIX SensorDataTypeRotationMatrix {1637D8A2-4248-4275-865D-558DE84AEDFD},16
SENSOR_DATA_TYPE_LATITUDE_DEGREES SensorDataTypeLatitudeDegrees {055C74D8-CA6F-47D6-95C6-1ED3637A0FF4},2
SENSOR_DATA_TYPE_LONGITUDE_DEGREES SensorDataTypeLongitudeDegrees {055C74D8-CA6F-47D6-95C6-1ED3637A0FF4},3
SENSOR_DATA_TYPE_ALTITUDE_ELLIPSOID_METERS SensorDataTypeAltitudeEllipsoidMeters {055C74D8-CA6F-47D6-95C6-1ED3637A0FF4},5
One thing that makes Data Field identifiers different from sensor IDs is the use of a data type called PROPERTYKEY. A PROPERTYKEY consists of a GUID (similar to what sensors have), plus an extra number called a "PID" (property ID). You might notice that the GUID part of a PROPERTYKEY is common for sensors that are in the same category. Data Fields have a native data type for all of their values, such as Boolean, unsigned char, int, float, double, and so on.

In Win32/COM, the value of a Data Field is stored in a polymorphic data type called PROPVARIANT. In .NET, there is a CLR (Common Language Runtime) data type called .object. that does the same thing. You have to query and/or typecast the polymorphic data type to the "expected"/"documented" data type.

Use the SupportsDataField() method of the sensor to check the sensors for the Data Fields of interest. This is the most common programming idiom that we use to select sensors. Depending on the usage model of your app, you may only need a subset of the Data Fields, not all of them. Pick the sensors you want based on whether they support the Data Fields you need. Note that you also need to use type casting to assign the sub-classed member variables from the base class sensor.

?
1
2
3
4
5
6
7
8
9
10
11
12
13
14
15
16
17
18
19
20
21
22
23
24
25
26
27
28
ISensor* m_pAls;
ISensor* m_pAccel;
ISensor* m_pTilt;
// Cycle through the collection looking for sensors we care about.
ULONG ulCount = 0;
HRESULT hr = pSensorCollection->GetCount(&ulCount);
if (FAILED(hr))
{
    ::MessageBox(NULL, _T("Unable to get count of sensors on the computer."), _T("Sensor C++ Sample"), MB_OK | MB_ICONERROR);
    return -1;
}
for (int i = 0; i < (int)ulCount; i++)
{
    hr = pSensorCollection->GetAt(i, &pSensor);
    if (SUCCEEDED(hr))
    {
        VARIANT_BOOL bSupported = VARIANT_FALSE;
        hr = pSensor->SupportsDataField(SENSOR_DATA_TYPE_LIGHT_LEVEL_LUX, &bSupported);
        if (SUCCEEDED(hr) && (bSupported == VARIANT_TRUE)) m_pAls = pSensor;
        hr = pSensor->SupportsDataField(SENSOR_DATA_TYPE_ACCELERATION_Z_G, &bSupported);
        if (SUCCEEDED(hr) && (bSupported == VARIANT_TRUE)) m_pAccel = pSensor;
        hr = pSensor->SupportsDataField(SENSOR_DATA_TYPE_TILT_Z_DEGREES, &bSupported);
        if (SUCCEEDED(hr) && (bSupported == VARIANT_TRUE)) m_pTilt = pSensor;
        .
        .
        .
    }
}
Code: Use the SupportsDataField() method of the sensor to check for supported data field


Sensor Properties

In addition to Data Fields, sensors have Properties that can be used for identification and configuration. Table 4 shows the most commonly-used Properties. Just like Data Fields, Properties have constant names used by Win32/COM and .NET, and those constants are really PROPERTYKEY numbers underneath. Properties are extensible by vendors and also have PROPVARIANT polymorphic data types. Unlike Data Fields that are read-only, Properties have the ability to be Read/Write. It is up to the individual sensor's discretion as to whether or not it rejects Write attempts. As an app developer, you need to perform write-read-verify because no exception is thrown when a write attempt fails.

Table 4: Commonly used sensor Properties and PIDs

Identification(Win32/COM) Identification(.NET) PROPERTYKEY (GUID,PID)
SENSOR_PROPERTY_PERSISTENT_UNIQUE_ID SensorID {7F8383EC-D3EC-495C-A8CF-B8BBE85C2920},5
WPD_FUNCTIONAL_OBJECT_CATEGORY CategoryID {8F052D93-ABCA-4FC5-A5AC-B01DF4DBE598},2
SENSOR_PROPERTY_TYPE TypeID {7F8383EC-D3EC-495C-A8CF-B8BBE85C2920},2
SENSOR_PROPERTY_STATE State {7F8383EC-D3EC-495C-A8CF-B8BBE85C2920},3
SENSOR_PROPERTY_MANUFACTURER SensorManufacturer 7F8383EC-D3EC-495C-A8CF-B8BBE85C2920},6
SENSOR_PROPERTY_MODEL SensorModel {7F8383EC-D3EC-495C-A8CF-B8BBE85C2920},7
SENSOR_PROPERTY_SERIAL_NUMBER SensorSerialNumber (7F8383EC-D3EC-495C-A8CF-B8BBE85C2920},8
SENSOR_PROPERTY_FRIENDLY_NAME FriendlyName {7F8383EC-D3EC-495C-A8CF-B8BBE85C2920},9
SENSOR_PROPERTY_DESCRIPTION SensorDescription {7F8383EC-D3EC-495C-A8CF-B8BBE85C2920},10
SENSOR_PROPERTY_MIN_REPORT_INTERVAL MinReportInterval {7F8383EC-D3EC-495C-A8CF-B8BBE85C2920},12
SENSOR_PROPERTY_CONNECTION_TYPE SensorConnectionType {7F8383EC-D3EC-495C-A8CF-B8BBE85C2920},11
SENSOR_PROPERTY_DEVICE_ID SensorDevicePath {7F8383EC-D3EC-495C-A8CF-B8BBE85C2920},15
SENSOR_PROPERTY_RANGE_MAXIMUM SensorRangeMaximum {7F8383EC-D3EC-495C-A8CF-B8BBE85C2920},21
SENSOR_PROPERTY_RANGE_MINIMUM SensorRangeMinimum {7F8383EC-D3EC-495C-A8CF-B8BBE85C2920},20
SENSOR_PROPERTY_ACCURACY SensorAccuracy {7F8383EC-D3EC-495C-A8CF-B8BBE85C2920},17
SENSOR_PROPERTY_RESOLUTION SensorResolution {7F8383EC-D3EC-495C-A8CF-B8BBE85C2920},18


Configuration(Win32/COM) Configuration(.NET) PROPERTYKEY (GUID,PID)
SENSOR_PROPERTY_CURRENT_REPORT_INTERVAL ReportInterval {7F8383EC-D3EC-495C-A8CF-B8BBE85C2920},13
SENSOR_PROPERTY_CHANGE_SENSITIVITY ChangeSensitivity {7F8383EC-D3EC-495C-A8CF-B8BBE85C2920},14
SENSOR_PROPERTY_REPORTING_STATE ReportingState {7F8383EC-D3EC-495C-A8CF-B8BBE85C2920},27


Setting Sensor Sensitivity

The sensitivity setting is probably the most useful Property of a sensor. It can be used to assign a threshold that controls or filters the number of SensorDataReports sent to the host computer. In this way, traffic can be reduced: only send up those DataUpdated events that are truly worthy of bothering the host CPU. The way Microsoft has defined the data type of this Sensitivity property is a little unusual. It is a container type called IPortableDeviceValues in Win32/COM and SensorPortableDeviceValues in .NET. This container holds a collection of tuples, each of which is a Data Field PROPERTYKEY followed by the sensitivity value for that Data Field. The sensitivity always uses the same units of measure and data type as the matching Data Field.

?
1
2
3
4
5
6
7
8
9
10
11
12
13
14
15
16
17
18
19
20
21
22
23
24
25
26
27
28
29
30
31
32
33
34
35
36
37
38
39
40
41
42
43
44
// Configure sensitivity
// create an IPortableDeviceValues container for holding the <Data Field, Sensitivity> tuples.
IPortableDeviceValues* pInSensitivityValues;
hr = ::CoCreateInstance(CLSID_PortableDeviceValues, NULL, CLSCTX_INPROC_SERVER, IID_PPV_ARGS(&pInSensitivityValues));
if (FAILED(hr))
{
    ::MessageBox(NULL, _T("Unable to CoCreateInstance() a PortableDeviceValues collection."), _T("Sensor C++ Sample"), MB_OK | MB_ICONERROR);
    return -1;
}
// fill in IPortableDeviceValues container contents here: 0.1 G sensitivity in each of X, Y, and Z axes.
PROPVARIANT pv;
PropVariantInit(&pv);
pv.vt = VT_R8; // COM type for (double)
pv.dblVal = (double)0.1;
pInSensitivityValues->SetValue(SENSOR_DATA_TYPE_ACCELERATION_X_G, &pv);
pInSensitivityValues->SetValue(SENSOR_DATA_TYPE_ACCELERATION_Y_G, &pv);
pInSensitivityValues->SetValue(SENSOR_DATA_TYPE_ACCELERATION_Z_G, &pv);
// create an IPortableDeviceValues container for holding the <SENSOR_PROPERTY_CHANGE_SENSITIVITY, pInSensitivityValues> tuple.
IPortableDeviceValues* pInValues;
hr = ::CoCreateInstance(CLSID_PortableDeviceValues, NULL, CLSCTX_INPROC_SERVER, IID_PPV_ARGS(&pInValues));
if (FAILED(hr))
{
    ::MessageBox(NULL, _T("Unable to CoCreateInstance() a PortableDeviceValues collection."), _T("Sensor C++ Sample"), MB_OK | MB_ICONERROR);
    return -1;
}
// fill it in
pInValues->SetIPortableDeviceValuesValue(SENSOR_PROPERTY_CHANGE_SENSITIVITY, pInSensitivityValues);
// now actually set the sensitivity
IPortableDeviceValues* pOutValues;
hr = pAls->SetProperties(pInValues, &pOutValues);
if (FAILED(hr))
{
    ::MessageBox(NULL, _T("Unable to SetProperties() for Sensitivity."), _T("Sensor C++ Sample"), MB_OK | MB_ICONERROR);
    return -1;
}
// check to see if any of the setting requests failed
DWORD dwCount = 0;
hr = pOutValues->GetCount(&dwCount);
if (FAILED(hr) || (dwCount > 0))
{
    ::MessageBox(NULL, _T("Failed to set one-or-more Sensitivity values."), _T("Sensor C++ Sample"), MB_OK | MB_ICONERROR);
    return -1;
}
PropVariantClear(&pv);

Requesting permissions for Sensors

The end user may consider the information provided by sensors to be sensitive, i.e., Personally Identifiable Information (PII). Data Fields such as the computer's location (e.g., latitude and longitude), could be used to track the user. Therefore, before use, Windows forces apps to get end-user permission to access the sensor. Use the State property of the sensor and the RequestPermissions() method of the SensorManager if needed.

The RequestPermissions() method takes an array of sensors as an argument, so you can ask for permission for more than one sensor at a time if you want. The C++/COM code is shown below. Note that you must provide an (ISensorCollection *) argument to RequestPermissions().

?
1
2
3
4
5
6
7
8
9
10
11
12
13
14
15
16
17
18
19
20
21
22
23
24
25
26
27
28
29
30
31
// Get the sensor's state
SensorState state = SENSOR_STATE_ERROR;
HRESULT hr = pSensor->GetState(&state);
if (FAILED(hr))
{
    ::MessageBox(NULL, _T("Unable to get sensor state."), _T("Sensor C++ Sample"), MB_OK | MB_ICONERROR);
    return -1;
}
// Check for access permissions, request permission if necessary.
if (state == SENSOR_STATE_ACCESS_DENIED)
{
    // Make a SensorCollection with only the sensors we want to get permission to access.
    ISensorCollection *pSensorCollection = NULL;
    hr = ::CoCreateInstance(CLSID_SensorCollection, NULL, CLSCTX_INPROC_SERVER, IID_PPV_ARGS(&pSensorCollection));
    if (FAILED(hr))
    {
        ::MessageBox(NULL, _T("Unable to CoCreateInstance() a SensorCollection."),
            _T("Sensor C++ Sample"), MB_OK | MB_ICONERROR);
        return -1;
    }
    pSensorCollection->Clear();
    pSensorCollection->Add(pAls); // add 1 or more sensors to request permission for...
    // Have the SensorManager prompt the end-user for permission.
    hr = m_pSensorManager->RequestPermissions(NULL, pSensorCollection, TRUE);
    if (FAILED(hr))
    {
        ::MessageBox(NULL, _T("No permission to access sensors that we care about."),
            _T("Sensor C++ Sample"), MB_OK | MB_ICONERROR);
        return -1;
    }
}

Sensor Data Update

Sensors report data by throwing an event called a DataUpdated event. The actual Data Fields are packaged inside a SensorDataReport, which is passed to any attached DataUpdated event handlers. Your app can obtain the SensorDataReport by hooking a callback handler to the sensor's DataUpdated event. The event occurs in a Windows Sensor Framework thread, which is a different thread than the message-pump thread used to update your app's GUI. Therefore, you will need to do a "hand-off" of the SensorDataReport from the event handler (Als_DataUpdate) to a separate handler (Als_UpdateGUI) that can execute on the context of the GUI thread. In .NET, such a handler is called a delegate function.

The example below shows preparation of the delegate function. In C++/COM, you must use the SetEventSink method to hook the callback. The callback cannot simply be a function; it must be an entire class that inherits from ISensorEvents and also implements IUnknown. The ISensorEvents interface must have callback function implementations for:

?
1
2
3
4
5
6
7
8
9
10
11
12
13
14
15
16
17
18
19
20
21
22
STDMETHODIMP OnEvent(ISensor *pSensor, REFGUID eventID, IPortableDeviceValues *pEventData);
        STDMETHODIMP OnDataUpdated(ISensor *pSensor, ISensorDataReport *pNewData);
        STDMETHODIMP OnLeave(REFSENSOR_ID sensorID);
        STDMETHODIMP OnStateChanged(ISensor* pSensor, SensorState state);
// Hook the Sensor for any DataUpdated, Leave, or StateChanged events.
SensorEventSink* pSensorEventClass = new SensorEventSink();  // create C++ class instance
ISensorEvents* pSensorEvents = NULL;
// get the ISensorEvents COM interface pointer
HRESULT hr = pSensorEventClass->QueryInterface(IID_PPV_ARGS(&pSensorEvents));
if (FAILED(hr))
{
    ::MessageBox(NULL, _T("Cannot query ISensorEvents interface for our callback class."),
        _T("Sensor C++ Sample"), MB_OK | MB_ICONERROR);
    return -1;
}
hr = pSensor->SetEventSink(pSensorEvents); // hook COM interface of our class to Sensor eventer
if (FAILED(hr))
{
    ::MessageBox(NULL, _T("Cannot SetEventSink on the Sensor to our callback class."),
        _T("Sensor C++ Sample"), MB_OK | MB_ICONERROR);
    return -1;
}
Code: Set a COM Event Sink for the sensor

The DataUpdated event handler receives the SensorDataReport (and the sensor that initiated the event) as arguments. It calls the Invoke() method of the form to post those items to the delegate function. The GUI thread runs the delegate function posted to its Invoke queue and passes the arguments to it. The delegate function casts the data type of the SensorDataReport to the expected subclass, gaining access to its Data Fields. The Data Fields are extracted using the GetDataField() method of the SensorDataReport object. Each of the Data Fields has to be typecast to their "expected"/"documented" data types (from the generic/polymorphic data type returned by the GetDataField() method). The app can then format and display the data in the GUI.

The OnDataUpdated event handler receives the SensorDataReport (and the sensor what initiated the event) as arguments. The Data Fields are extracted using the GetSensorValue() method of the SensorDataReport object. Each of the Data Fields needs to have their PROPVARIANT checked for their "expected"/"documented" data types. The app can then format and display the data in the GUI. It is not necessary to use the equivalent of a C# delegate. This is because all C++ GUI functions (such as ::SetWindowText() shown here) use Windows message-passing to post the GUI update to the GUI thread / message-loop (the WndProc of your main window or dialog box).

?
1
2
3
4
5
6
7
8
9
10
11
12
13
14
15
16
17
18
19
20
21
22
23
24
25
26
27
28
STDMETHODIMP SensorEventSink::OnDataUpdated(ISensor *pSensor, ISensorDataReport *pNewData)
{
    HRESULT hr = S_OK;
    if ((NULL == pNewData) || (NULL == pSensor)) return E_INVALIDARG;
    float fLux = 0.0f;
    PROPVARIANT pv = {};
    hr = pNewData->GetSensorValue(SENSOR_DATA_TYPE_LIGHT_LEVEL_LUX, &pv);
    if (SUCCEEDED(hr))
    {
        if (pv.vt == VT_R4) // make sure the PROPVARIANT holds a float as we expect
        {
            // Get the lux value.
            fLux = pv.fltVal;
            // Update the GUI
            wchar_t *pwszLabelText = (wchar_t *)malloc(64 * sizeof(wchar_t));
            swprintf_s(pwszLabelText, 64, L"Illuminance Lux: %.1f", fLux);
            BOOL bSuccess = ::SetWindowText(m_hwndLabel, (LPCWSTR)pwszLabelText);
            if (bSuccess == FALSE)
            {
                ::MessageBox(NULL, _T("Cannot SetWindowText on label control."),
                    _T("Sensor C++ Sample"), MB_OK | MB_ICONERROR);
            }
            free(pwszLabelText);
        }
    }
    PropVariantClear(&pv);
    return hr;
}
You can just reference properties of the SensorDataReport object to extract Data Fields from the SensorDataReport. This only works for the .NET API (in the Win32/COM API, you must use the GetDataField method), and for "well known" or "expected" Data Fields of that particular SensorDataReport subclass. It is possible (using something called "Dynamic Data Fields") for the underlying driver/firmware to "piggyback" any "extended/unexpected" Data Fields inside SensorDataReports. To extract those, you must use the GetDataField method.


Using Sensors in Windows UI Apps

Unlike the Desktop mode, Windows UI/WinRT Sensor API follows a common template for each of the sensors:

There is usually a single event called ReadingChanged that calls the callback with an xxxReadingChangedEventArgs containing a Reading object holding the actual data. (the accelerometer is an exception; it also has a Shaken event).
The hardware-bound instance of the sensor class is retrieved using the GetDefault() method.
Polling can be done with the GetCurrentReading() method.
Windows UI apps are typically written either in JavaScript or in C#. There are different language-bindings to the API, which result in a slightly different capitalization appearance in the API names and a slightly different way that events are handled. The simplified API is easier to use, and the pros and cons are listed in Table 5.

Table 5: Sensor APIs for Windows UI Apps, pros and cons

Feature Pros Cons
SensorManager There is no SensorManager to deal with. Apps use the GetDefault() method to get an instance of the sensor class.
It is not possible to search for arbitrary sensor instances. If more than one of a particular sensor type exists on a computer, you will only see the "first" one.
It is not possible to search for arbitrary sensor types or categories by GUID. Vendor value-add extensions are inaccessible.
Events Apps only worry about the DataUpdated event.
Apps have no access to Enter, Leave, StatusChanged, or arbitrary event types. Vendor value-add extensions are inaccessible.
Sensor properties Apps only worry about the ReportInterval property.
Apps have no access to the other properties, including the most useful one: Sensitivity.
Other than manipulating the ReportInterval property, there is no way for Windows UI apps to tune or control the flow rate of Data Reports.
Apps cannot access arbitrary Properties by PROPERTYKEY. Vendor value-add extensions are inaccessible.
Data Report properties Apps only worry about a few, pre-defined Data Fields unique to each sensor.
Apps have no access to other Data Fields. If sensors "piggy-back" additional well-known Data Fields in a Data Report beyond what Windows UI apps expect, the Data Fields are inaccessible.
Apps cannot access arbitrary Data Fields by PROPERTYKEY. Vendor value-add extensions are inaccessible.
Apps have no way to query at run-time what Data Fields a sensor supports. It can only assume what the API pre-defines.

Summary

Windows 8 APIs provide developers an opportunity to take advantage of sensors available on different platforms under both the traditional Desktop mode and the new Windows UI app interface. In this document, we have presented an overview of the sensor APIs available to developers looking to create applications with Windows 8, focusing on the APIs and code samples for Desktop mode apps.


Appendix


Coordinate System for Different Form Factors

The Windows API reports X, Y, and Z axes in a manner that is compatible with the HTML5 standard (and Android). It is also called the "ENU" system because X faces virtual "East", Y faces virtual "North", and Z faces "Up".

To figure out the direction of rotation, use the "Right Hand Rule":

* Point the thumb of your right hand in the direction of one of the axes.

* Positive angle rotation around that axis will follow the curve of your fingers.


These are the X, Y, and Z axes for a tablet form-factor PC, or phone (left) and for a clamshell PC (right). For more esoteric form factors (for example, a clamshell that is convertible into a tablet), the .standard. orientation is when it is in the TABLET state.

If you intend to develop a navigation application (e.g., 3D space game), you need to convert from "ENU" systems in your program. This can be done easily using matrix multiplication. Graphics libraries such as Direct3D and OpenGL have APIs for handling this.